Intro
Decided to write this because I faced some trouble setting this up on my home-server, although the NixOS wiki page have useful information, it doesn’t tell you step by step on how to properly do it.
But to start, let’s explain what each term really means (you can skip this if you know):
NixOS
NixOS is a peculiar Linux distribution and operating system, although being created on 2003, only now people are starting to notice it. NixOS fundamentally changes the way you interact with a operating system (someday I will digress more about it).
Proxmox
A popular plataform for containerization and virtualization, I’m currently using because of the vast amout of resource related, however fact is that everything you do in Proxmox can be done in any Linux distribution (Proxmox actually runs Debian for instance), and who knows in the future plan to move from Proxmox to NixOS with microvm and declarative QEMU VMs modules.
Linux Containers (LXC)
Widely used by Proxmox, Linux Containers or LXC is another type of virtualisation method that allows to run multiple isolated Linux systems without needing to virtualise hardware, thus reducing that overhead (kinda similar to Docker).
Of course, it won’t provide the same level of control, isolation and security as a virtual machine, but it’s lower resource usage can be compelling (since it allows one host to virtualise more, utilizing more of the server resources) and it provides some level of isolation and control.
Low isolation                                                High isolation
Low Resource usage                                      High Resource usage
<------------------------------------------------------------------------->
Bare-metal                LXC, Docker & Podman             Virtual Machines
This article provides information on how to run NixOS on a LXC inside a Proxmox host
Requirements
it’s important that you have an existing machine with Nix or NixOS which can be downloaded using the nix-installer by determinate systems (if you are installing Nix), or NixOS download (to install NixOS ISO).
After installing it, enable Nix flakes experimental command, which the Flakes NixOS wiki page already covers how to do it.
Generate and build config
Create a file with the following snippet, this will be the NixOS configuration used by your Proxmox LXC, you can change it later of course:
# lxc.nix
{ pkgs, lib, config, modulesPath, ...}:

{
  imports = [
    (modulesPath + "/virtualisation/proxmox-lxc.nix")
  ];

  proxmoxLXC = {
    privileged = false; # CHANGE THIS if you want your container to be privileged
    manageNetwork = false;
    manageHostName = false;
  };

  systemd.suppressedSystemUnits = [
    "dev-mqueue.mount"
    "sys-kernel-debug.mount"
    "sys-fs-fuse-connections.mount"
  ];

  boot.loader.grub.enable = false;

  networking.firewall = {
    enable = true;
  };

  # to enable nix command and flakes
  nix.settings.experimental-features = [ "nix-command" "flakes" ];

  environment.systemPackages = [
    pkgs.hello
  ];

  users.users = {
    john = {
      isNormalUser = true;
      initialPassword = "password"; # it's important to specify the initialPassword, otherwise you won't be able to log in
      extraGroups = [ "wheel" "video" "audio" ];
    };
  };

  system.stateVersion = lib.version;
}
Then run the following commands:
# make sure to be in the same directory as the file above
nix run github:nix-community/nixos-generators -- -c ./lxc.nix -f proxmox-lxc
Your output will be something like this:
real    0m53.606s
user    6m10.943s
sys     0m3.194s
/nix/store/81iivzhb7wrj2k0fsfrxqhd5sfna04yj-tarball/tarball/nixos-system-x86_64-linux.tar.xz
Simply copy the generated tar.xz in the nix store to your current directory:
cp /nix/store/81iivzhb7wrj2k0fsfrxqhd5sfna04yj-tarball/tarball/nixos-system-x86_64-linux.tar.xz ./nixos-lxc.linux.tar.xzUpload the image to Proxmox
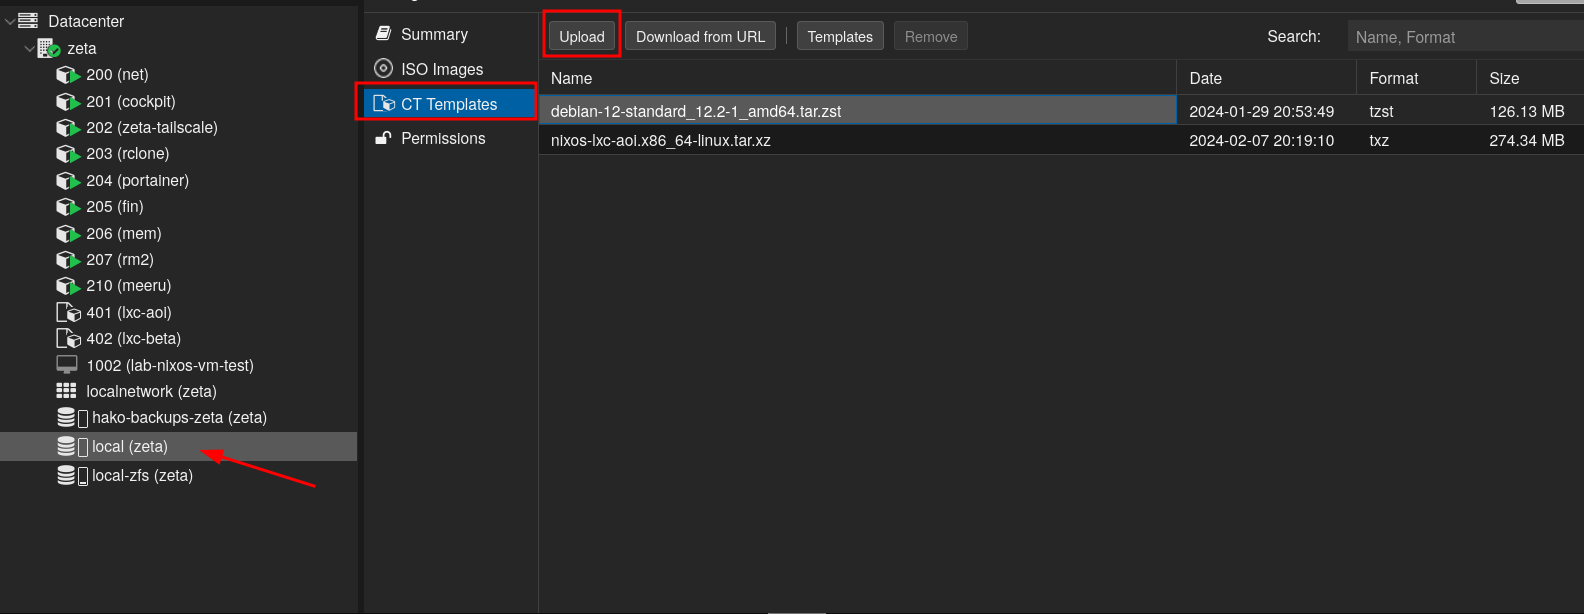
On your Proxmox Virtual Environment go to your local Storage (where you put ISO images and CT templates) and click on upload:
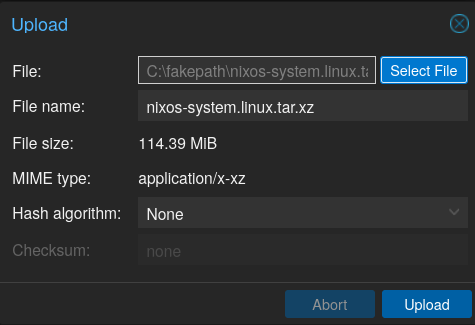
After clicking the “Upload” button, just upload the previously generated CT template (nixos-lxc.linux.tar.xz):
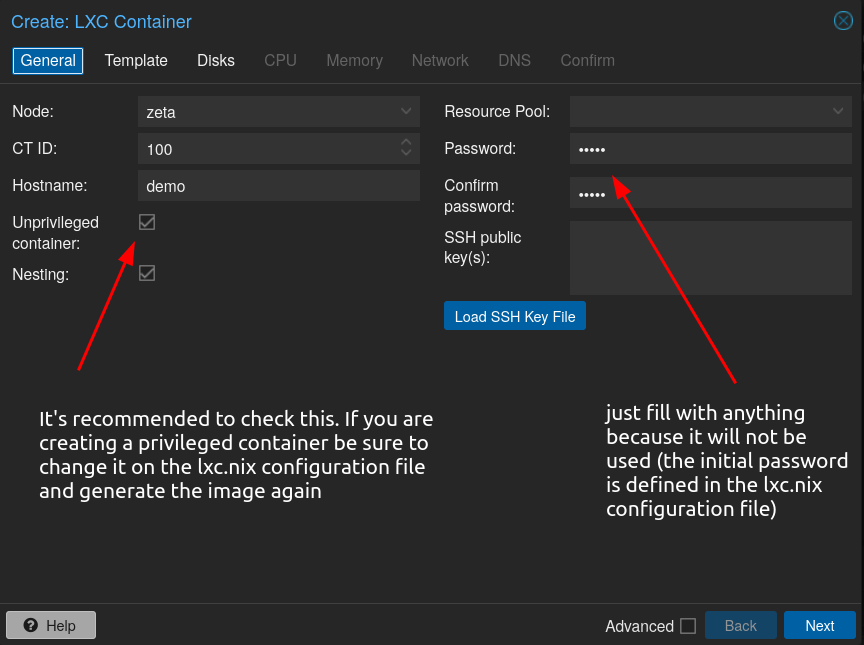
Now you can simply create a LXC container using that image:
Set anything in the Password field since it will not be used by the CT (we defined earlier on the lxc.nix file).
It’s recommended to check “Unprivileged container”, but if you want to create a privileged container don’t check it, but be sure that you also set proxmoxLXC.privileged to true on the lxc.nix file that we created before.
In simple terms, it’s recommended to create an unprivileged container because of security reasons, the way it works is that the host OS (Proxmox host) lies to the container telling it’s running on user ID 0 (root), but it’s actually running on user ID 10000, which makes it much more harder to gain access to host OS resources (since it’s not really a root user), but for everything inside the container, it feels like you are root.
Of course, this means that you won’t be able to perform certain actions (since it depends on the host OS kernel access which could only be obtained through true root) (one example could be mounting CIFS/NFS shares on the CT filesystem), but for the majority of cases it’s best to use an unprivileged container.
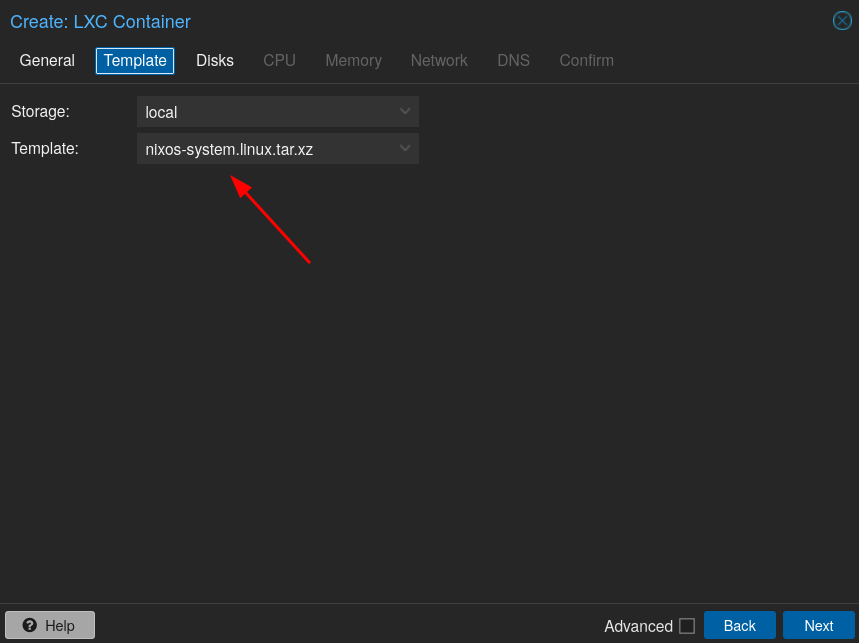
Select the previously generated template:
Set the disk size of your LXC Container (it’s preferable to give little disk space because you can increase size later, however note that we are running NixOS which can use more storage than common distros):
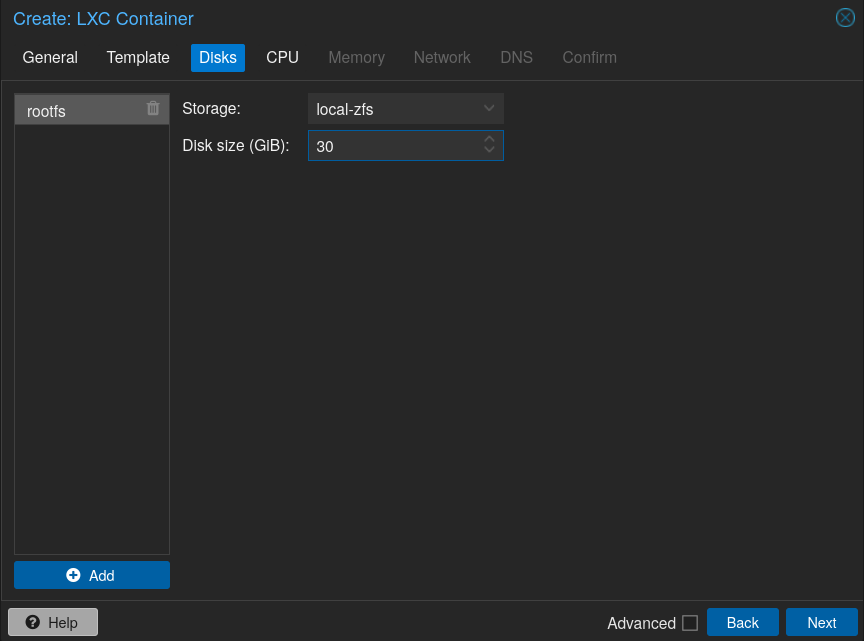
Give the number of cores that the container will be able to use, note that this doesn’t mean you won’t be able to use that same cores for other VMs and CTs:
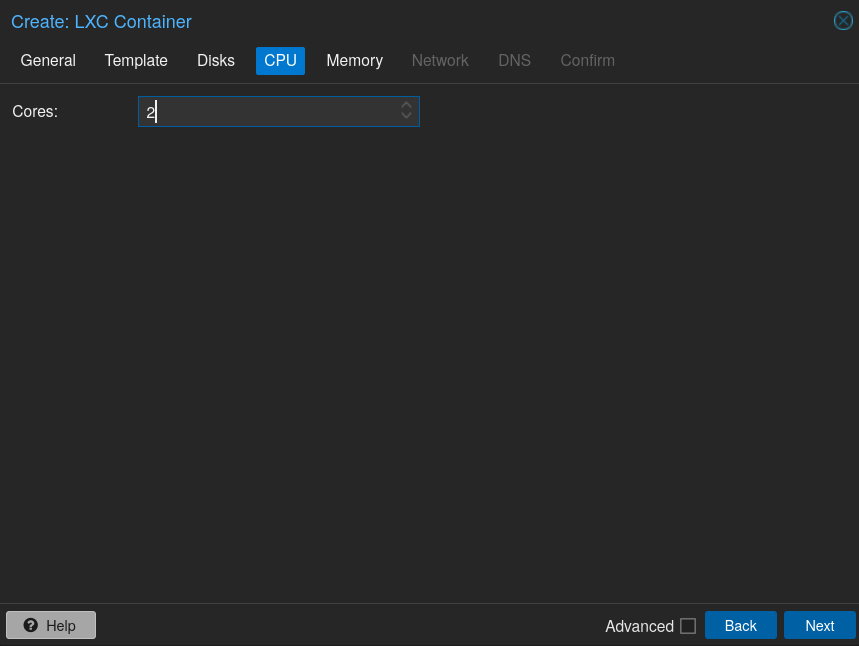
Same thing as CPU Cores but for RAM, you can give more if you want to:
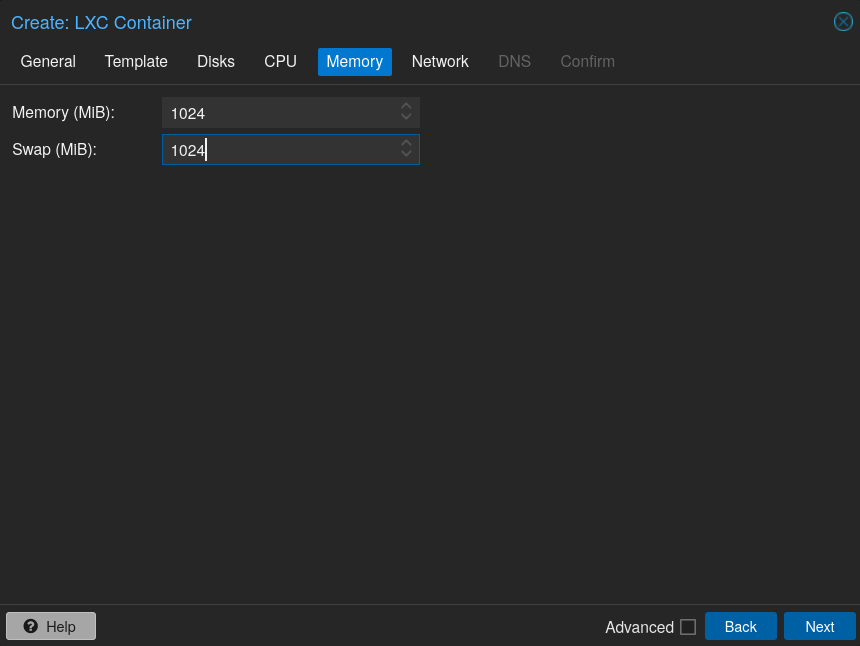
Network settings of your container, normally I would give a static IP based on the container ID (which is 100 in this demo), but for this demo I will make my DHCP server handle it:
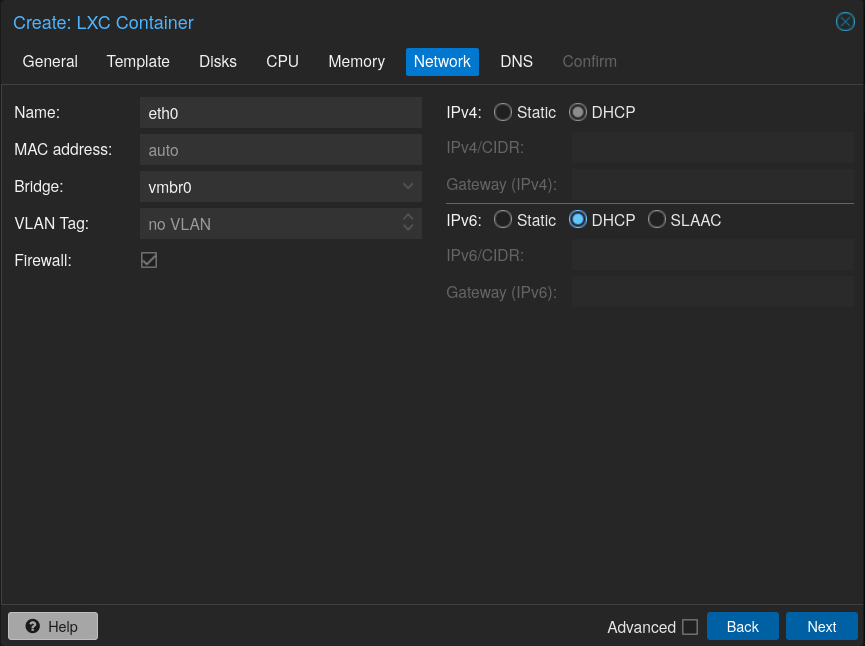
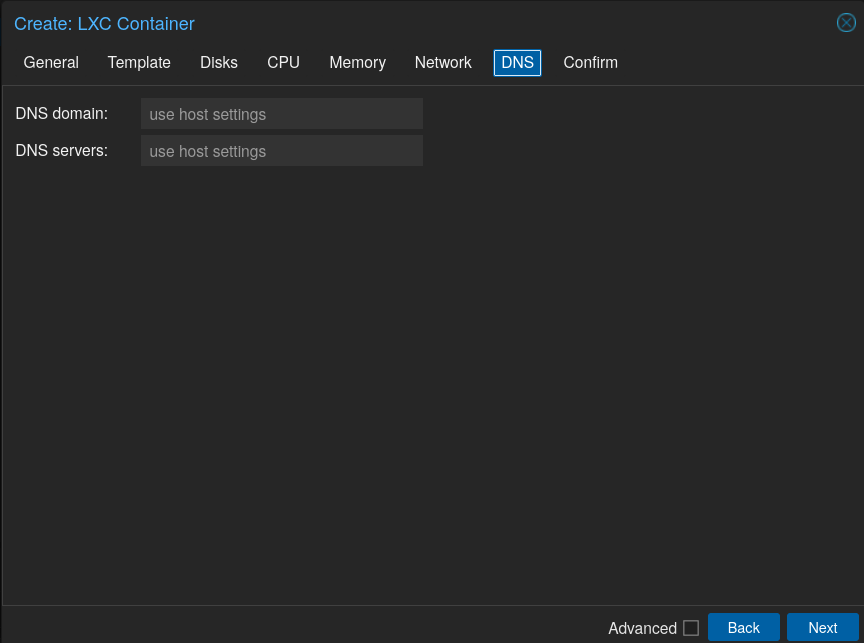
You can specify which DNS it will use, normally it default to the Proxmox or your network router settings:
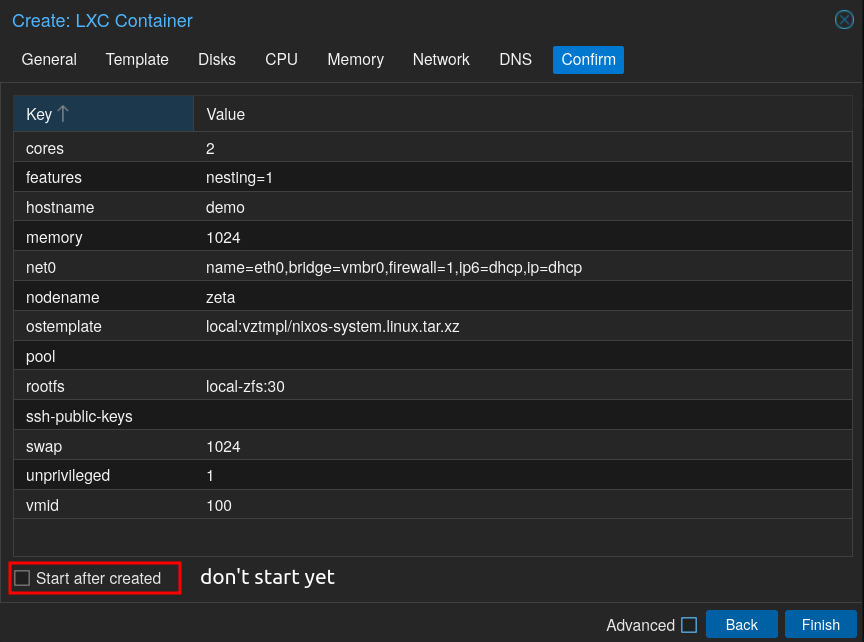
Here’s a summary of all configuration we did, before finishing, be sure to not check “Start after created” since we will tweak it before starting:
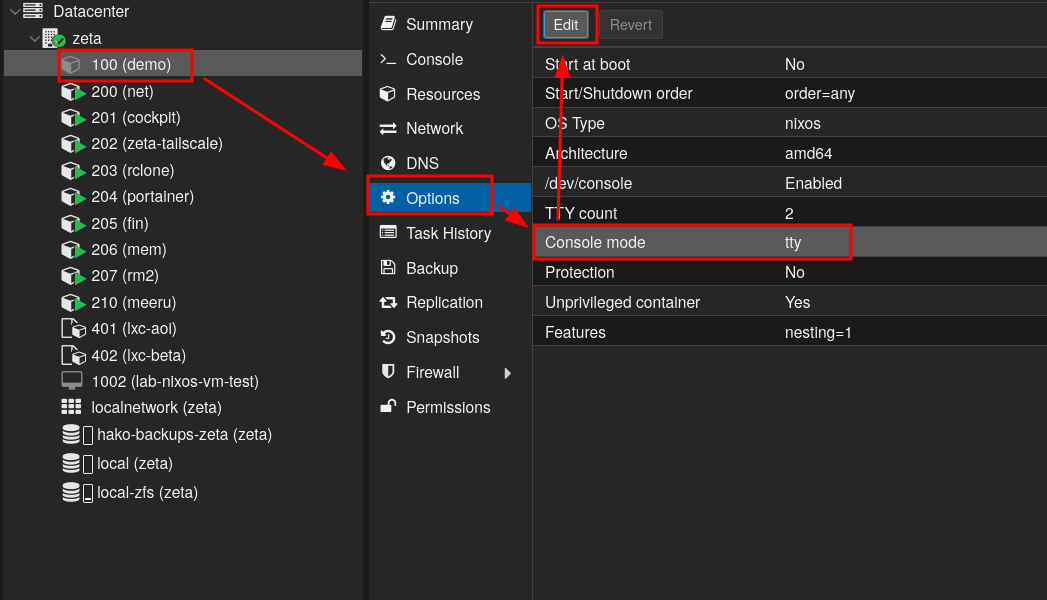
Go to container options and then edit “Console Mode” option:
Change it from “Default (tty)” to “/dev/console”:
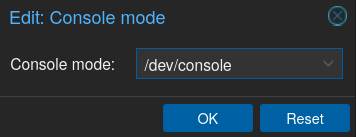 For some reason if we do not change this, the console will not appear, it’s also stated at the NixOS Wiki Proxmox page
Finally, we can start our container and go to “Console” tab.
We will be presented with a a login prompt, Let’s fill information we specify earlier in the lxc.nix file, which is login “john” and password “password”:
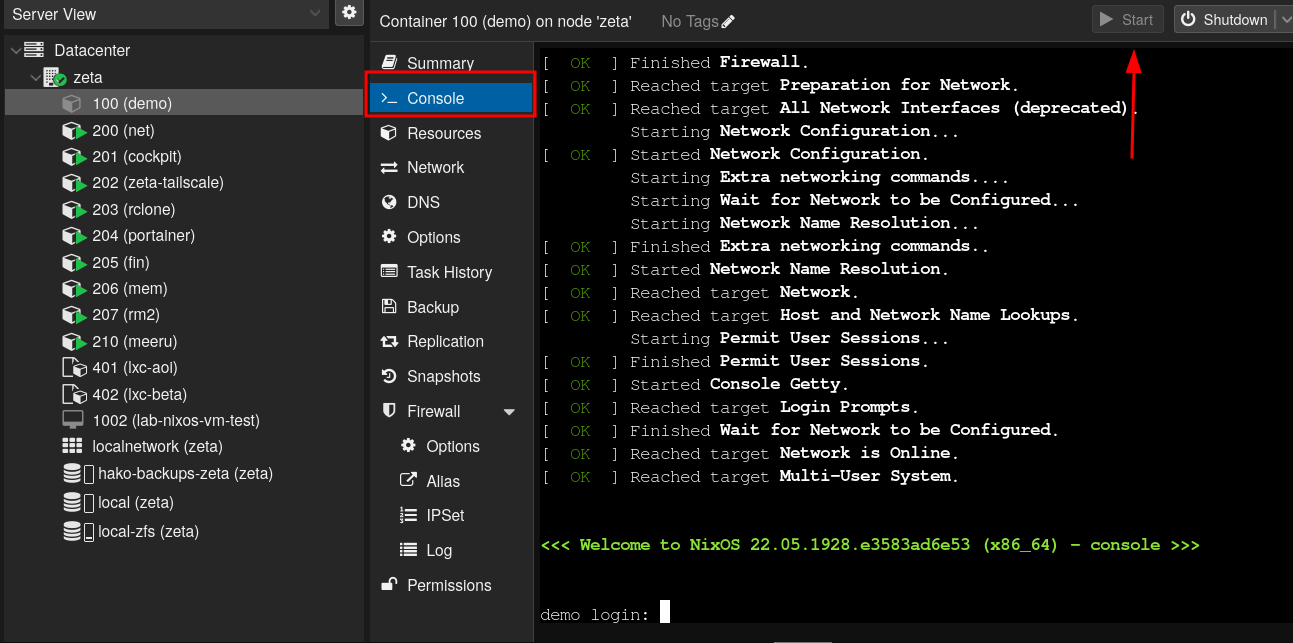
You will be able use it now, but before starting using it, be sure to first run:
sudo nix-channel --update

And then rebooting the container.
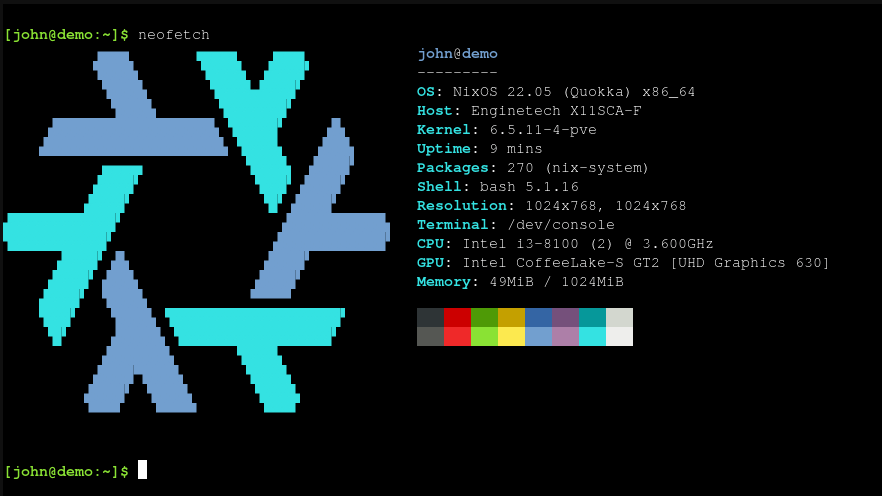
Now we can use NixOS inside our Proxmox LXC container. From here the possibilities are endless:
If you want to tweak it you can:
-
Copy the
lxc.nixfile we created before to the LXC container path/etc/nixos/configuration.nixand rebuild it inside the container usingsudo nixos-rebuild switch. -
Move the
lxc.nixfile into a flake. -
Build the configuration on your NixOS machine and copy the build artifacts to the LXC container by running
nixos-rebuild switch --flake .#lxc --target-host "john@<container-ip>" --use-remote-sudo - You can enable docker inside the LXC container (however I’m afraid that you can encounter some caveats, I’m running normally but I’ve hearded some people having issues).
On my nix-config repository, I’ve created two LXC templates for anyone to use (one for privileged container called aoi and another for unprivileged called beta), to generate the proxmox-lxc template images we used earlier in the tutorial just run:
# either `aoi` for unprivileged CT
nix build 'github:abehidek/nix-config#"templates.lxc.aoi"'

# or `beta` for privileged CT
nix build 'github:abehidek/nix-config#"templates.lxc.beta"'
Which will generate a symlink in your current directory that will point to the build in which is the image is located under the tarball directory.
/nix/store/1p69z747vl6vjzw9v3s6y32hy893fr5j-tarball🔒
λ tree
.
├── nix-support
│   ├── hydra-build-products
│   └── system
└── tarball
    └── nixos-system-x86_64-linux.tar.xz

3 directories, 3 files
There’s also other hosts that are in fact, Proxmox LXC containers, you can also give a look there if you want examples.
I would like to mention and thank the sources in which I found these informations:
- NixOS Wiki - Proxmox Virtual Environment page
- https://mtlynch.io/notes/nixos-proxmox
- https://blog.xirion.net/posts/nixos-proxmox-lxc <- This one is under construction and can only be accessed through Wayback Machine
- nixos-generators - Wouldn’t be possible without it, go star it
That’s it, feel free to reach me if you have any doubts.
